
You’ll start by taking everything out and deciding what you really wear, then measure rod heights, shelf depths and shoe lengths so each inch works harder. Focus on vertical solutions—double rods, shelf risers, clear drawers and labeled bins—and keep daily items at eye level with seasonal pieces stacked above. Anchor tall units, add mirrors and soft lighting, and track use to stay lean; there’s a clear order to follow next.
Inventory Everything Before You Start

Before you make any changes, take everything out and sort it into categories: keep, donate, repair, seasonal, and discard. You’ll inventory each item, note sizes, condition, and frequency. Use garment tagging and a simple list to plan seasonal rotation. This clear audit frees you to pare down, prioritize essentials, and design storage that doubles space without clutter.
Measure Hanging Space by Garment Type

Once you’ve sorted everything, measure your hanging space by grouping garments by type—dresses, coats, blouses, shirts, pants, and skirts—and recording the average width each takes on a hanger. For each garment category, note quantity and average width, then calculate required rod length. Plan hanger spacing to prevent crowding; prioritize ease of access so your closet feels liberating and functional.
Record Vertical Clearance for Longest Items
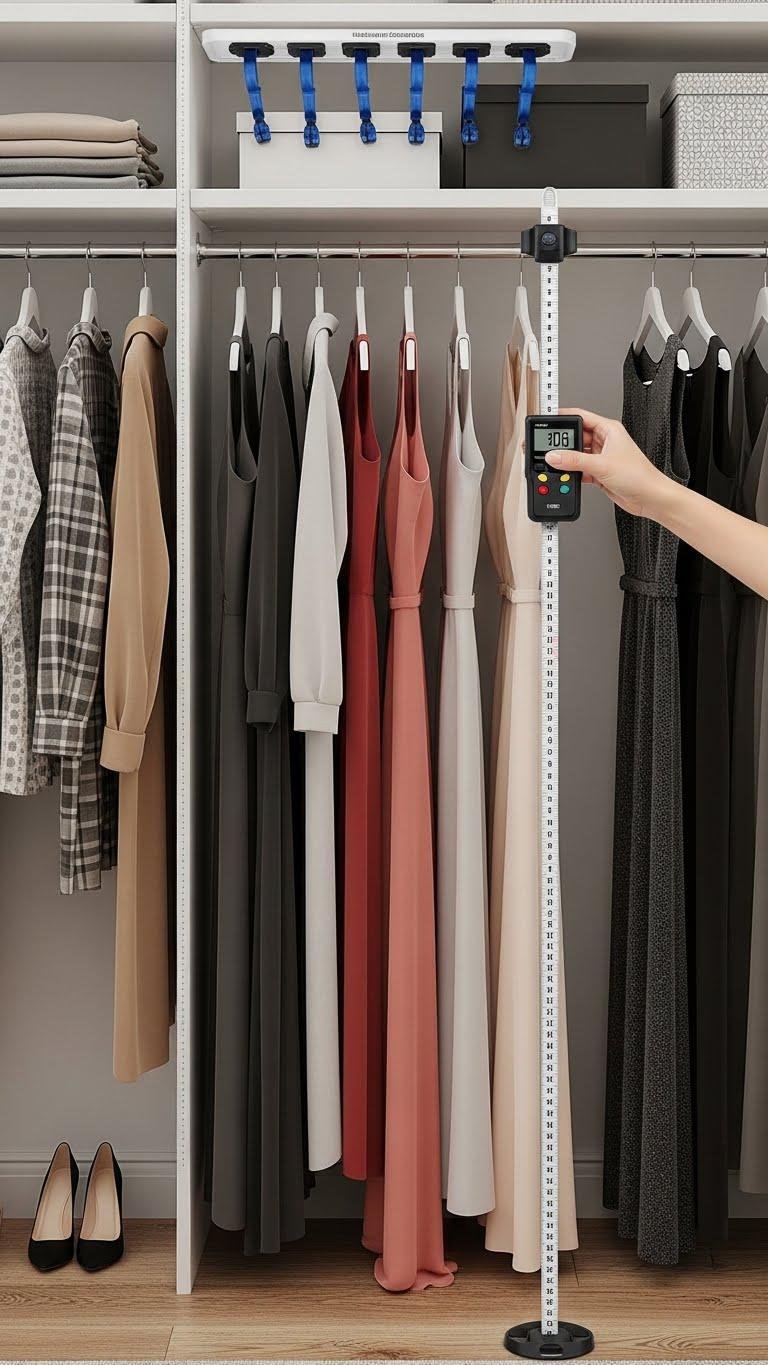
After grouping garments by type, measure the tallest item from hanger hook to hem and record that vertical clearance for each category so you know how much uninterrupted drop you need.
Then note fixtures like ceiling adapters or hanging harnesses that affect usable height. You’ll map clearances to closet zones, prioritize longer items, and reserve uninterrupted runs to keep garments uncreased and your space liberating.
Measure Shoe Lengths for Proper Shelf Depth
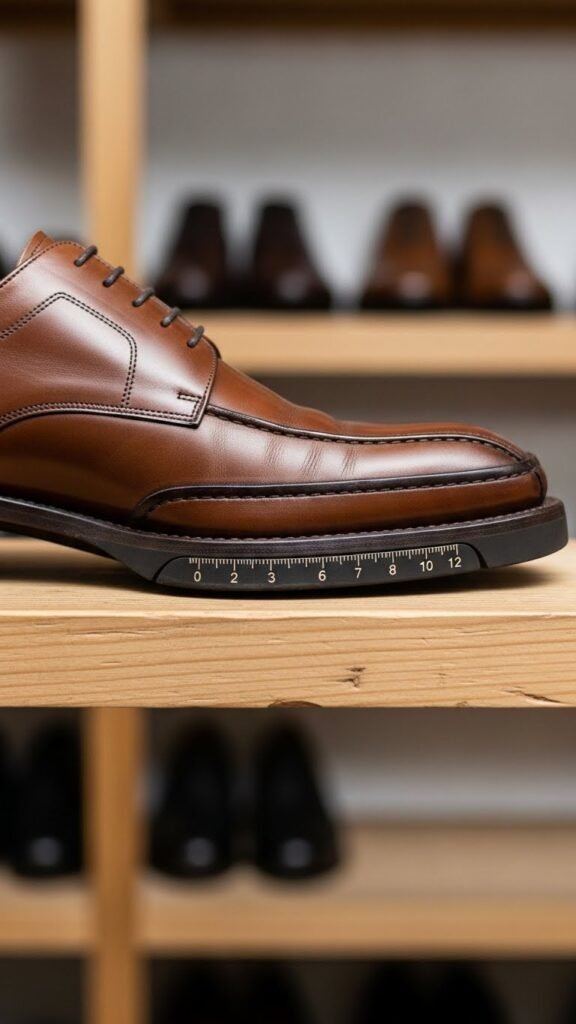
Measure each pair of shoe soles from toe to heel and note the longest length in each category so you can specify shelf depth that accommodates the biggest items without wasted space. You’ll follow a simple measurement guide: group sneakers, boots, sandals, record maximum foot depth per group, add clearance for ease, and set shelf depths accordingly so your closet stays efficient and liberating.
Adjust Rod Height for Each User

Because everyone grabs clothes at a different reach, set closet rods to match each user’s shoulder height and garment types so you actually use the space rather than fight it.
Measure shoulder-to-floor, allow ergonomic clearance for sleeves and hangers, and position rods to create personalized compartments for jackets, dresses, and shirts.
You’ll free movement and optimize storage without wasted vertical space.
Install Double Hanging Rods

Install a second rod to double usable hanging space without losing accessibility.
Measure clearances, choose rod materials that support load, and place the lower rod at a comfortable reach. Use matching brackets for neat lines, keep longer garments on one side, and add simple closet lighting to see colors and avoid overcrowding.
You’ll gain tidy, efficient storage and freedom to move.
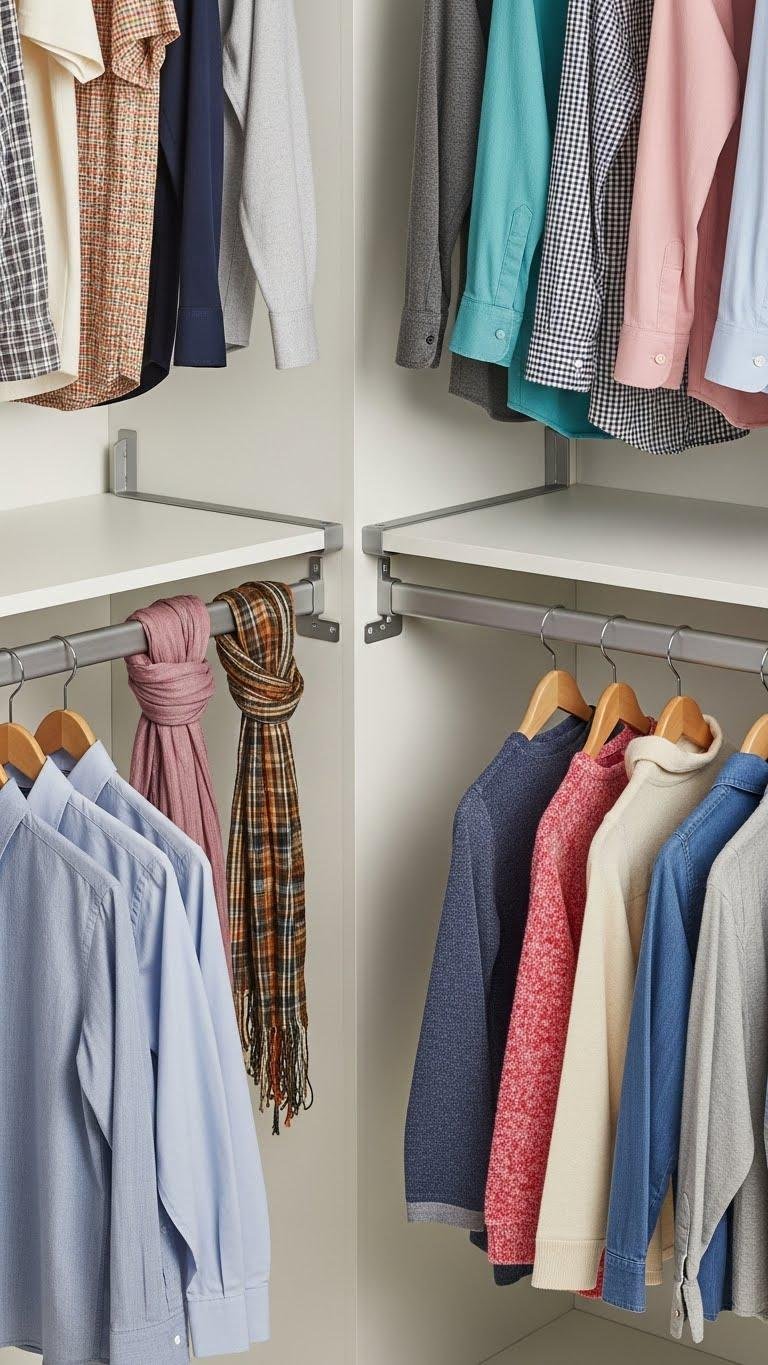
Add Perpendicular Rods to Use Corners
Paragraphs
Use Vertical Hanger Clips to Multiply Capacity
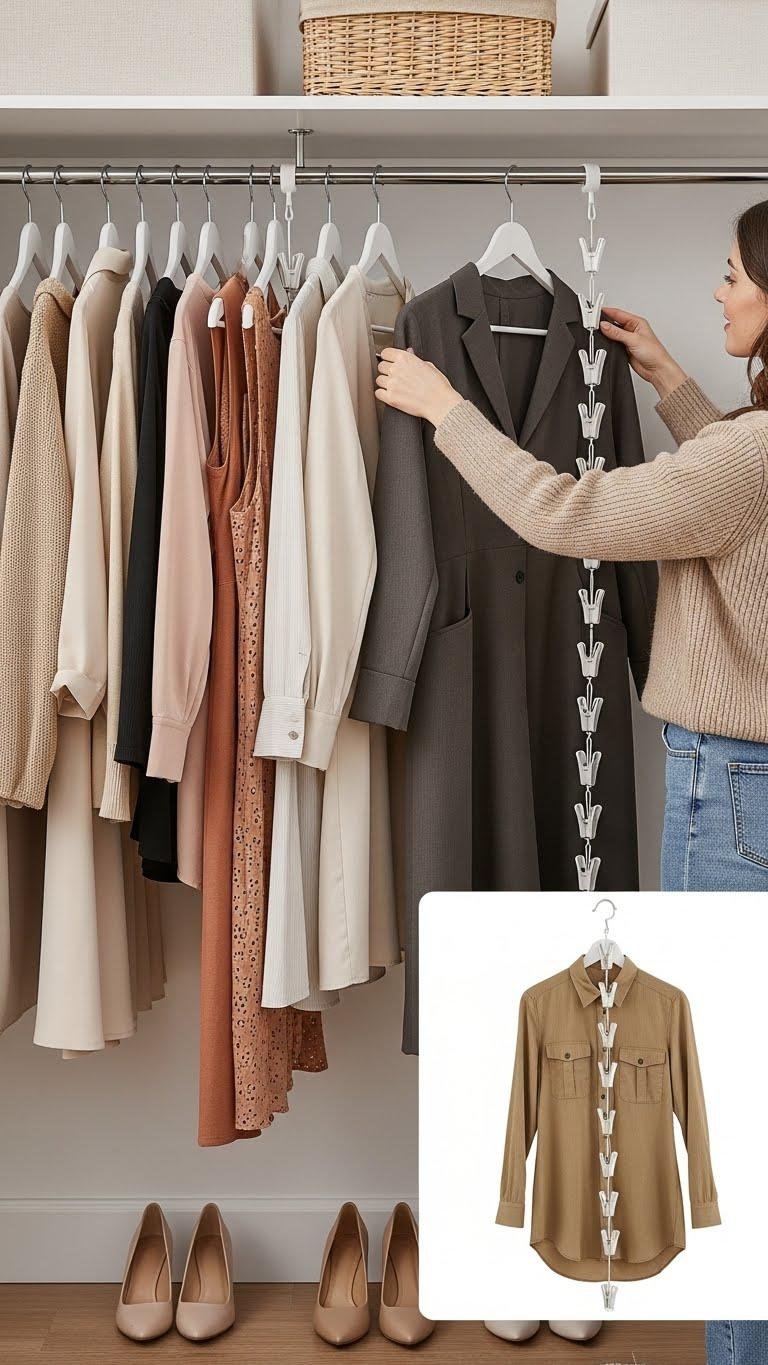
Once you’ve squeezed extra hanging space from corners, think vertically: vertical hanger clips let you stack multiple garments on a single rod without tangling or crowding.
You’ll install vertical clips in minutes, clip hanger multipliers to existing hangers, and drop garments down a column.
This frees floor space, speeds outfit selection, and keeps clothes visible and reachable—simple, liberated closet control.
Fit Pullout Pant and Tie Racks
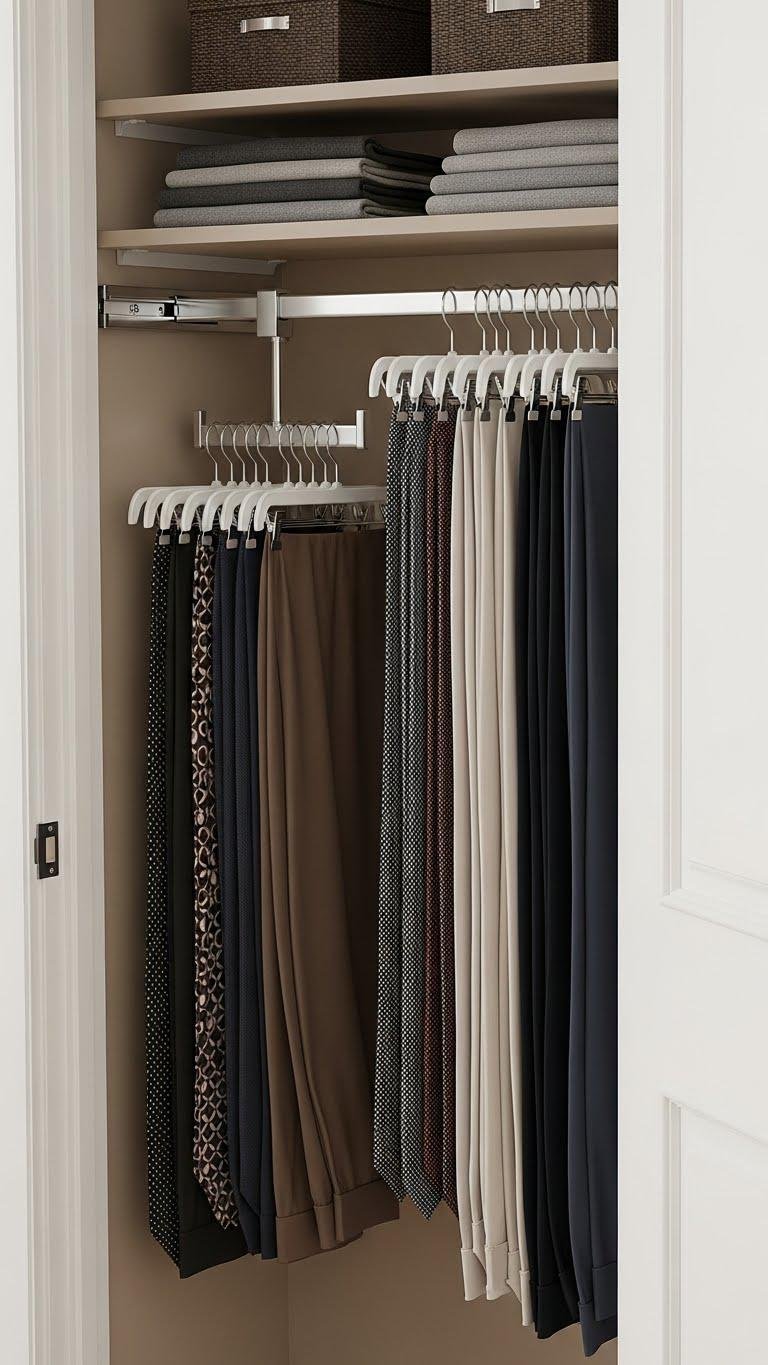
Slide a pullout pant or tie rack into your closet to make use of narrow gaps and keep accessories visible and wrinkle-free. You’ll install slim slides for smooth movement, mounting low or high depending on access. Use swivel hangers on multi-tier arms to flip through items fast.
This compact system frees floor space, keeps outfits organized, and speeds your daily routine.
Swap Built-In Closets for Freestanding Wardrobes
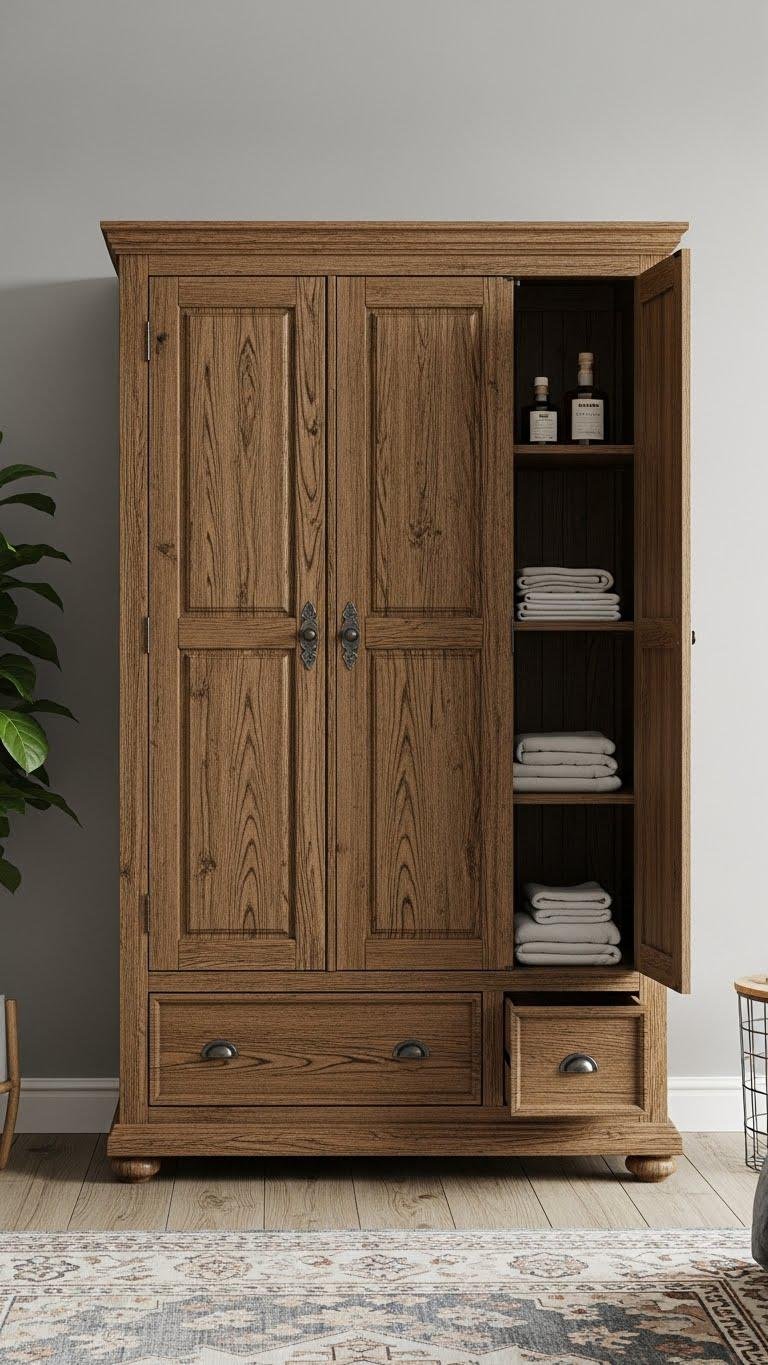
Swap out a built-in closet for freestanding wardrobes when you want flexibility and instant extra storage. You’ll gain mobility, freestanding aesthetics and freedom to reconfigure rooms.
Pick modular units with clear assembly tips, measure doorways, and plan positioning for airflow and lighting. Use shelves, drawers, and open hanging to optimize access.
You can relocate or sell pieces as needs change.
Choose Narrow Tall Wardrobes for Small Rooms
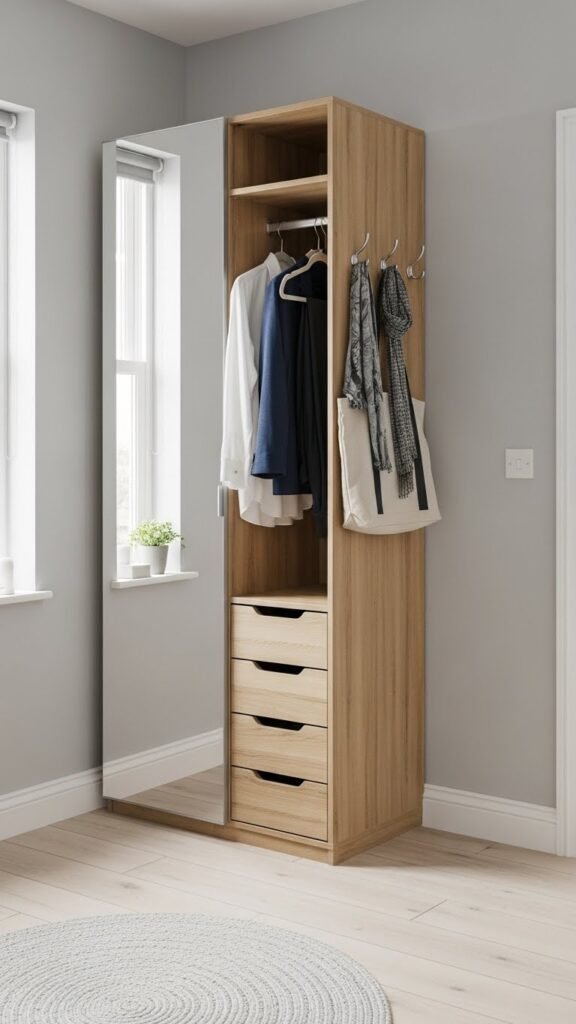
If you liked the flexibility of freestanding wardrobes, narrow tall units give that mobility a space-saving edge in small rooms.
You’ll favor slim profiles that tuck into corners or along hallways, offering vertical storage without crowding.
Choose light finishes, mirrored fronts, and anchored stability.
Arrange hanging, drawers, and hooks to maximize freedom of movement while keeping clothes accessible and the room airy.
Install Adjustable Modular Shelving Systems
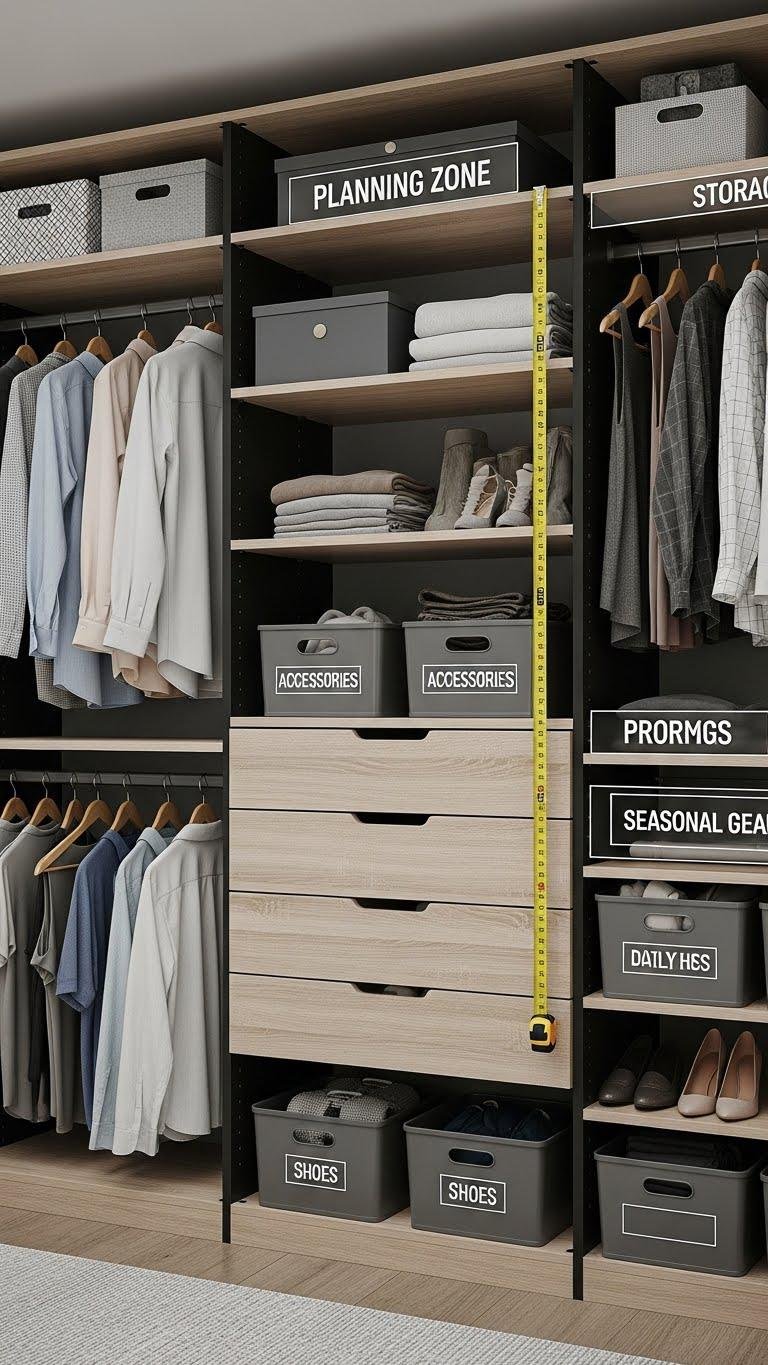
Think modular: install adjustable shelving systems that let you reconfigure shelves, drawers, and hanging rods as your needs change. You’ll mount adjustable brackets, set shelf heights, and add modular bins for shoes, accessories, or seasonal gear.
Measure first, plan zones for daily use versus storage, and use labels. This keeps your closet flexible, clutter-free, and aligned with the freedom to change.
Stack Clear Acrylic Drawers on Shelves

Clear acrylic drawers slide into place so you can see contents at a glance and stack vertically to multiply shelf capacity without sacrificing visibility.
You’ll measure shelf depth, choose uniform clear acrylic units, and plan drawer stacking to stabilize weight. Anchor stacks with non-slip pads, label fronts, and keep frequently used items at eye level.
This method frees space and simplifies daily access.
Use Shelf Risers and Drop-Front Shoe Boxes

Make more shelf room by combining low-profile risers with drop-front shoe boxes so you can stack and access items without pulling everything down.
Use clear risers to lift shoes, bags, and folded clothes, creating visible tiers. Pair with stackable boxes that open from the front for quick retrieval.
Label fronts, keep similar items together, and reclaim shelf depth for freedom and easy rotation.
Replace Dressers With Custom Closet Interiors
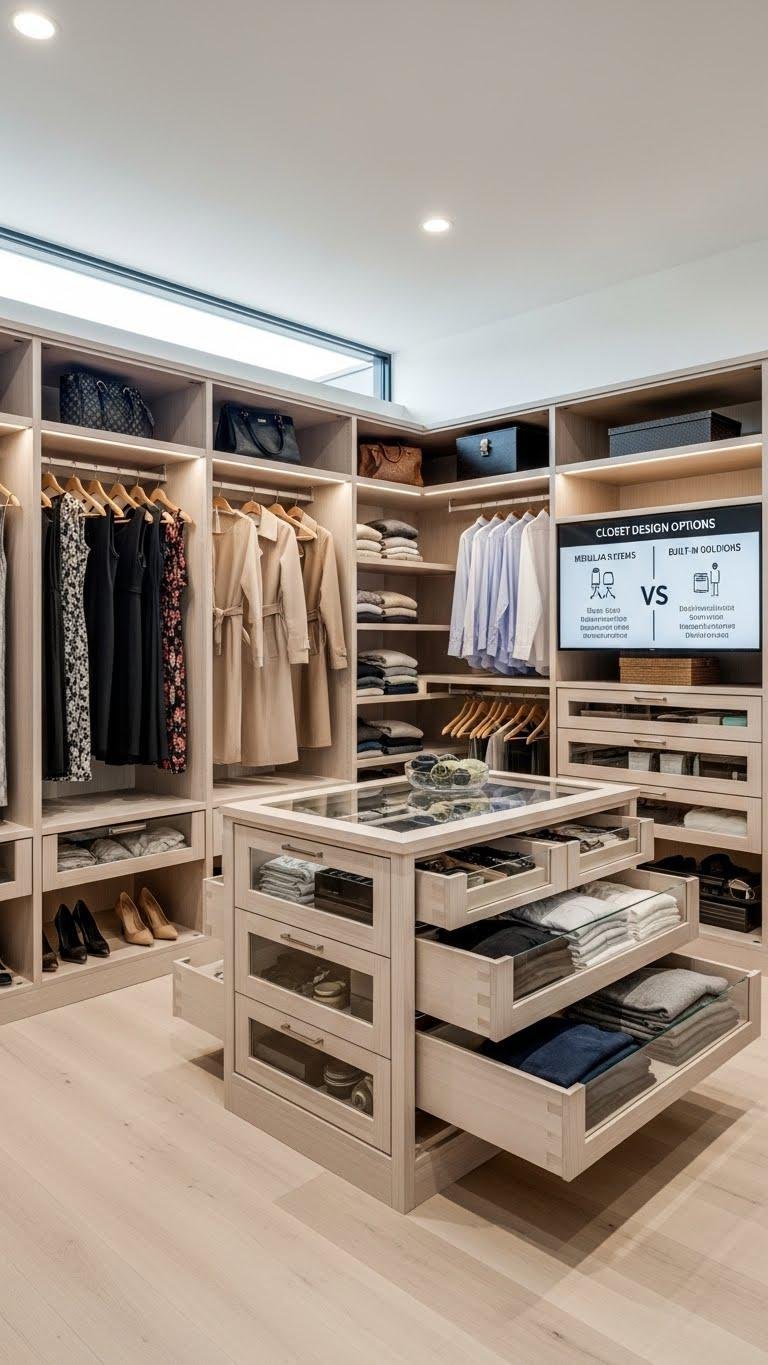
Swap bulky dressers for a tailored closet interior and reclaim floor space while improving accessibility. You’ll choose custom cabinetry sized to your wardrobe, freeing movement and simplifying routines.
Plan drawers, hanging zones, and open shelving for visual calm. Request organized pricing from suppliers, compare modular vs. built-in options, and install intentionally.
You’ll gain streamlined storage and the freedom to move.
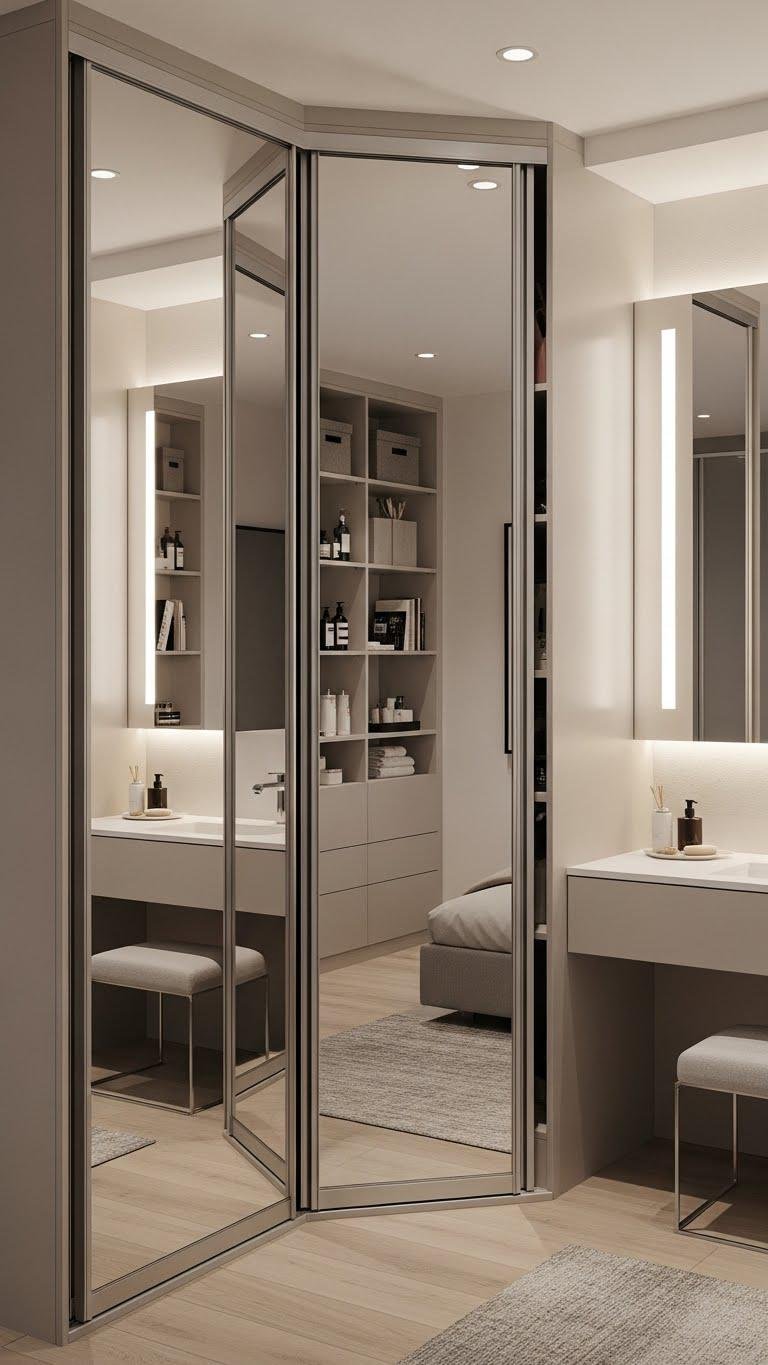
Add Mirrored Fronts and Integrated Units
Paragraphs
While you plan layout changes, add mirrored fronts and integrated units to amplify light and simplify routines. Use light reflecting panels on doors and sliding wardrobes to visually expand space and brighten corners.
Choose integrated units with concealed shelving and vanity integration so you can streamline dressing and storage. You’ll reduce clutter, cut task time, and keep the room open for movement and choice.
Use Bins and Baskets as Drawer Alternatives
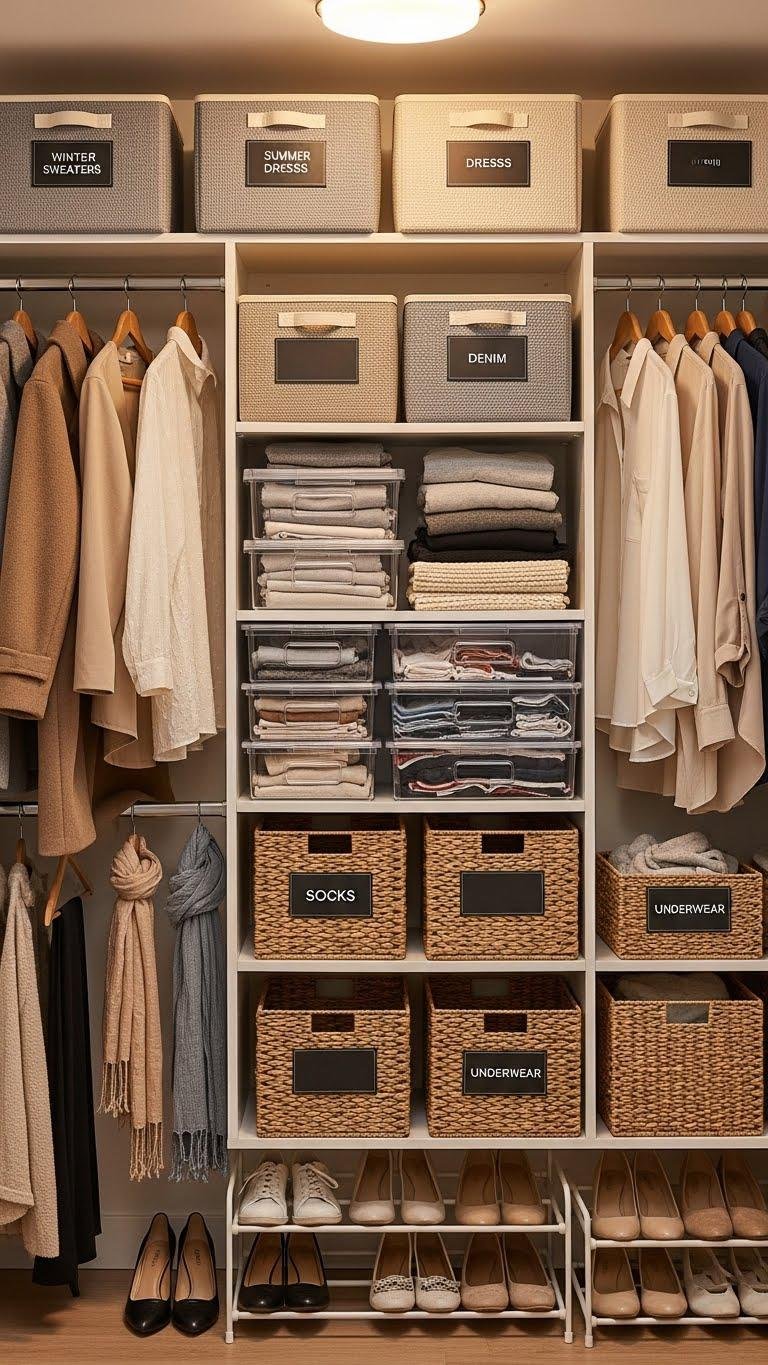
Think in regard to zones: group items by function and tuck them into labeled bins or baskets instead of relying on fixed drawers.
You’ll pick fabric bins for lightweight, flexible storage and decorative baskets where visibility matters.
Stackable, breathable containers free you from rigid layouts, so you can rearrange quickly.
Label clearly, rotate seasonally, and keep essentials accessible for a cleaner, freer closet.
Fold Clothes Vertically in Drawers

Turn your drawer into a visual filing system by folding clothes vertically so you can see every item at once. You’ll use space saving folds to stack shirts, socks, and leggings like cards.
Arrange by color or function for quick access. This drawer organization reduces rummaging, speeds dressing, and gives you the freedom to choose confidently each morning.
Declutter With a Capsule Wardrobe Approach

Because a smaller, intentional wardrobe makes daily choices easier, start by defining your capsule’s core — the 30–40 pieces you actually wear each season — and remove everything that doesn’t fit, flatter, or serve a clear purpose.
You’ll plan seasonal rotation, keep items that support style cohesion, and donate or store extras. This frees space, reduces decision fatigue, and lets you move with ease.
Prioritize Daily Items at Easy-Reach Heights
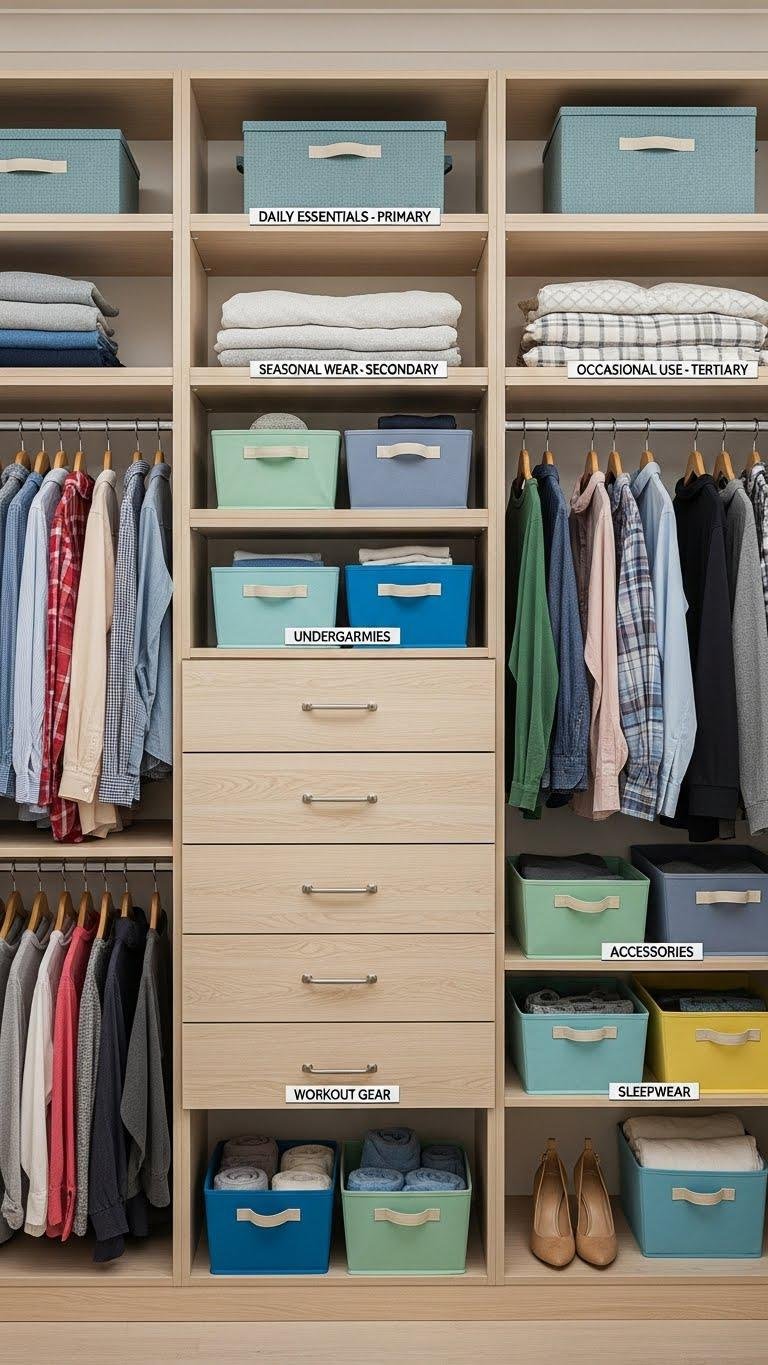
Usually, place the items you use every day at eye- to waist-level so you can grab them without stretching or bending. Assign clear Reach zones: primary for Daily essentials, secondary for weekly items, tertiary for seasonal pieces.
Label shelves or use color-coded bins so you’ll always return things to their spot. This simple system saves time, reduces clutter, and keeps your closet effortless to use.
Keep a Step Ladder or Reach Solution Handy
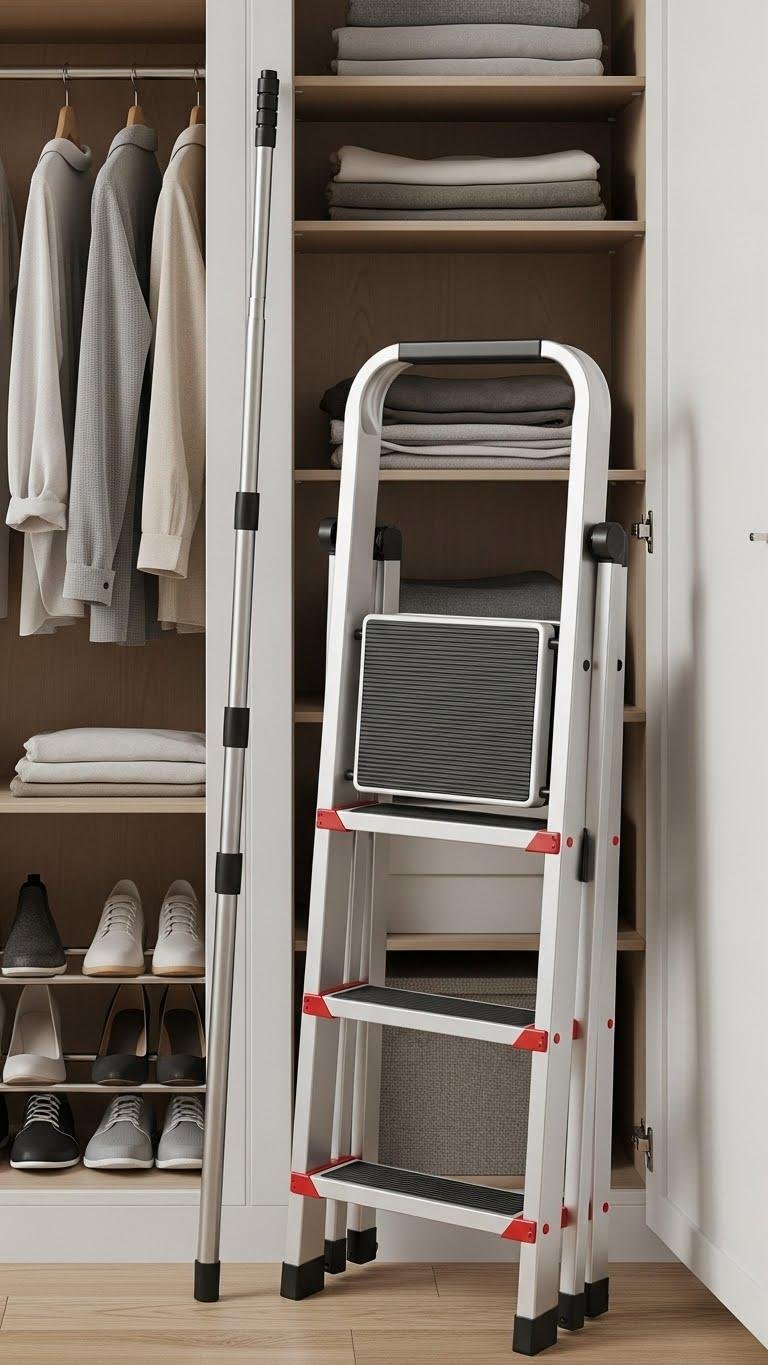
Once you’ve placed daily items within easy reach, keep a compact step ladder or grabber nearby so accessing higher or deeper storage stays quick and safe.
Choose a foldable step stool that tucks away and a telescoping pole with a secure grip for lightweight items.
Store them near the closet entrance for instant reach, preserving freedom and efficiency without clutter.
Optimize Shoe Storage With Slim Shelves
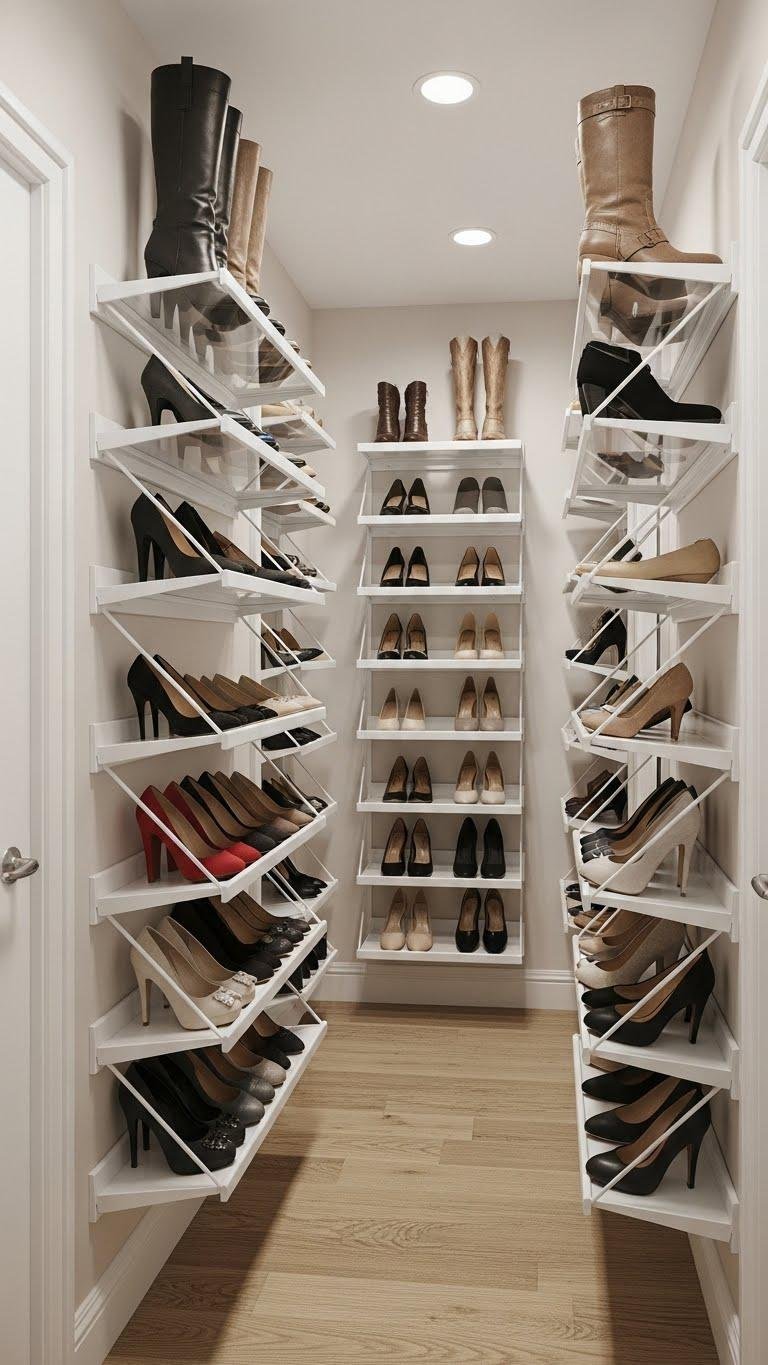
Slide slim shelves into tight vertical spaces to double your shoe capacity without bulk. You’ll install slim shelving along narrow walls, freeing floor space and keeping pairs visible. Use adjustable, angled compartments to hold heels or flats securely.
Measure depth, anchor to studs, and stagger heights for boots. You’ll gain accessibility and a tidy, liberating closet that maximizes every inch.