
You can make your fridge work for your health with small, evidence-based changes that cut waste, reduce contamination risk, and make healthy choices easier. Start by setting temps and mapping cold spots, then group foods, use clear containers, and handle produce and meats properly — simple steps that save time and keep food safer. Stick with these practical routines and you’ll notice better meals and less stress; here’s how to get there.
Set Your Fridge to the Right Temperature
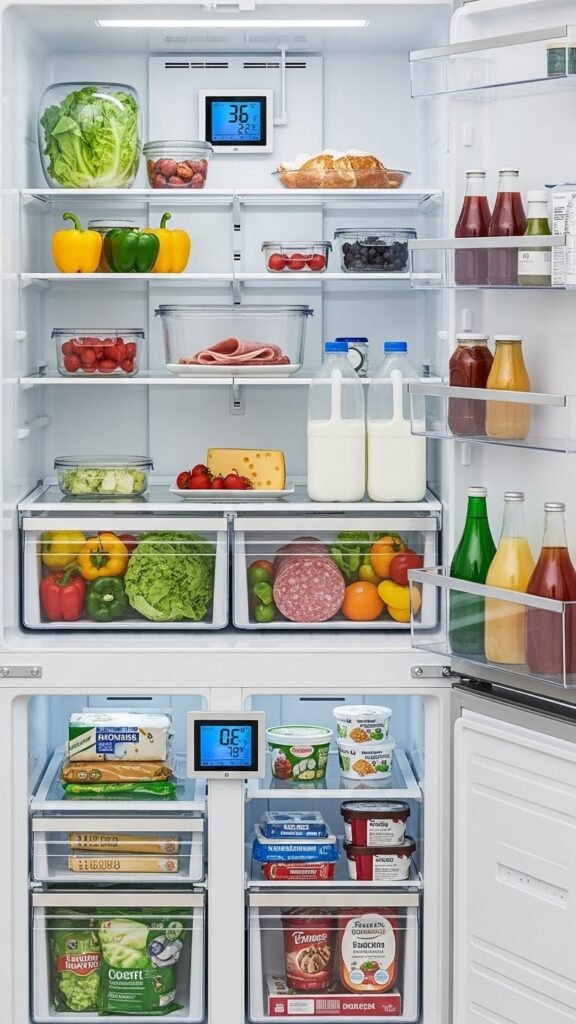
You should set your refrigerator between 35°F and 38°F (1.7–3.3°C) and the freezer at 0°F (-18°C) to slow bacterial growth and keep food fresh without freezing produce; studies and food-safety guidelines show those ranges balance safety and quality.
You’ll achieve ideal temp control, preserve flavors, and gain Energy savings.
Check seals, avoid overloading, and monitor with a thermometer for reliable results.
Designate Zones by Food Type
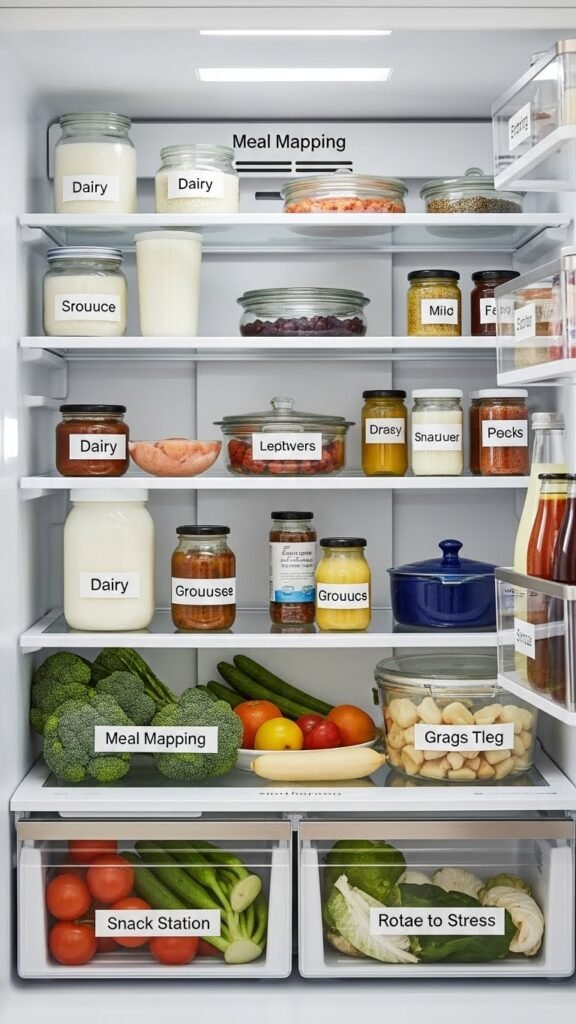
Because different foods need different conditions to stay fresh, designate clear zones in your fridge to cut spoilage and make meal prep faster. Use Meal Mapping: group dairy, produce, condiments, and leftovers in consistent spots. Create a Snack Station at eye level for grab-and-go items.
Label shelves, track shelf-life, and rotate stock so you save time, money, and stress while staying flexible.
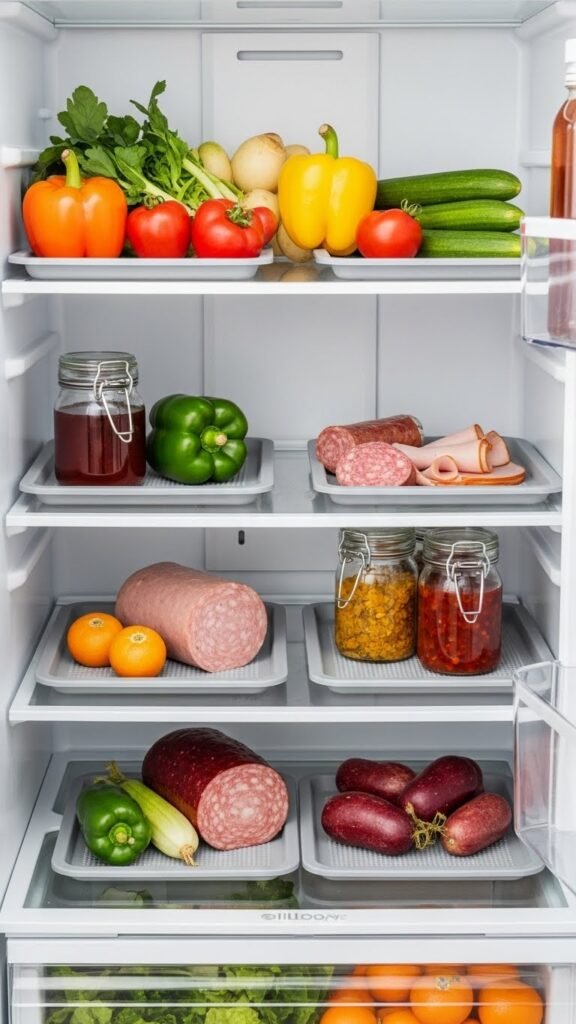
Store Raw Meat on the Bottom Shelf
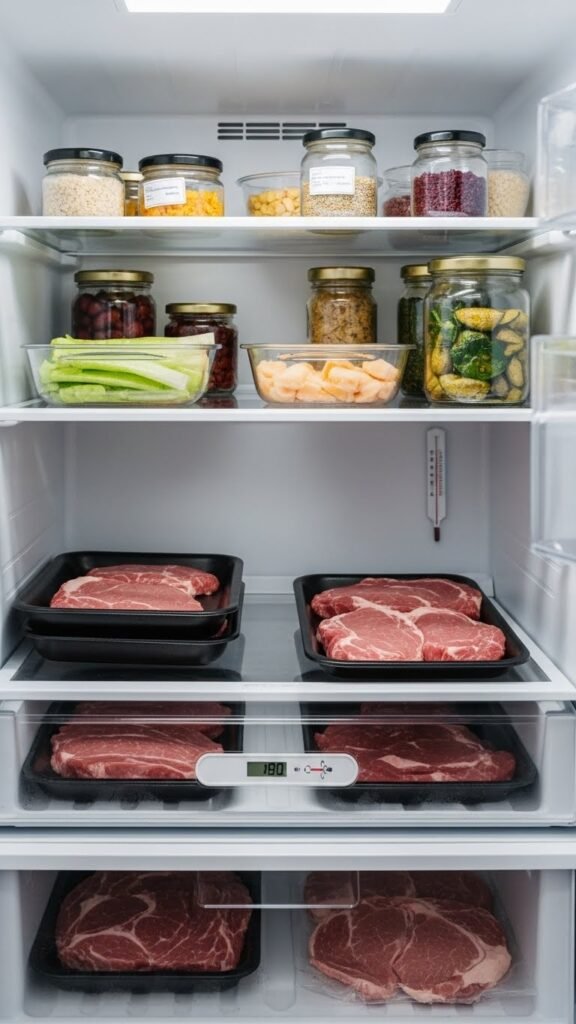
Having clear zones makes it easier to add a dedicated spot for raw meat: put it on the bottom shelf to prevent drips and cross-contamination.
You’ll reduce contamination risk, simplify cleanup, and keep other foods safe.
Use sealed trays, check packaging integrity, and practice temperature monitoring with a fridge thermometer.
These steps give you practical control and freedom without compromising food safety.
Keep Dairy on the Coldest Shelf

Often the coldest shelf is also the safest spot for milk, yogurt, and soft cheeses, so place dairy there to slow bacterial growth and extend freshness.
Use simple temperature mapping to identify that zone, then prioritize dairy placement accordingly.
You’ll protect flavor, cut waste, and gain peace of mind knowing your choices are backed by food-safety logic and practical, freedom-focused organization.
Use Door Bins for Condiments and Drinks
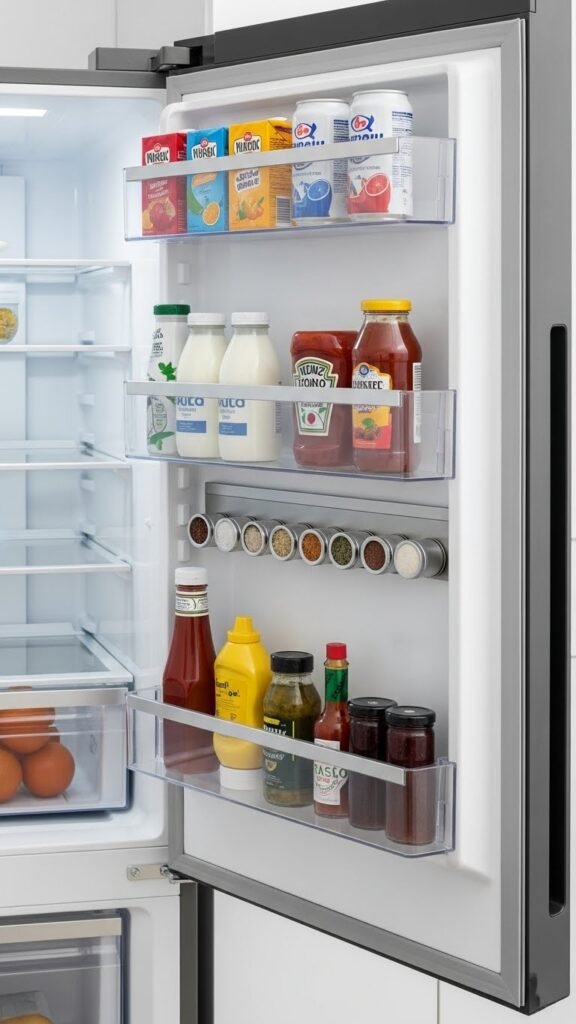
Swing open the door and you’ll see why those bins are perfect for condiments and drinks: they’re insulated by the door’s thickness and designed for frequent access, so keeping bottles, jars, and cartons there reduces the number of times you disturb colder interior zones.
Use an insulated caddy and magnetic storage for small tins; that keeps items reachable, visible, and preserves cold-zone stability while freeing shelf space.
Master Crisper Drawer Humidity Settings
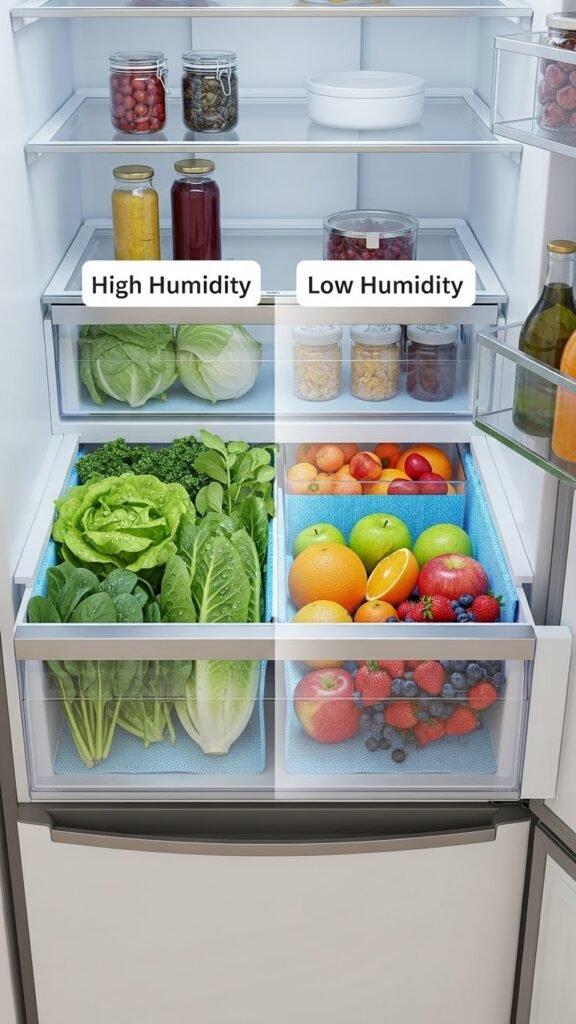
When you set your crisper drawer to the right humidity, you’ll extend the life of produce and cut down on waste.
You’ll use simple humidity calibration—high for leafy greens, low for fruits—to slow spoilage.
Add breathable Drawer liners to absorb excess moisture and prevent bruising.
This evidence-based, practical approach gives you freedom from waste and saves time, money, and stress.
Separate Ethylene-Producing Items
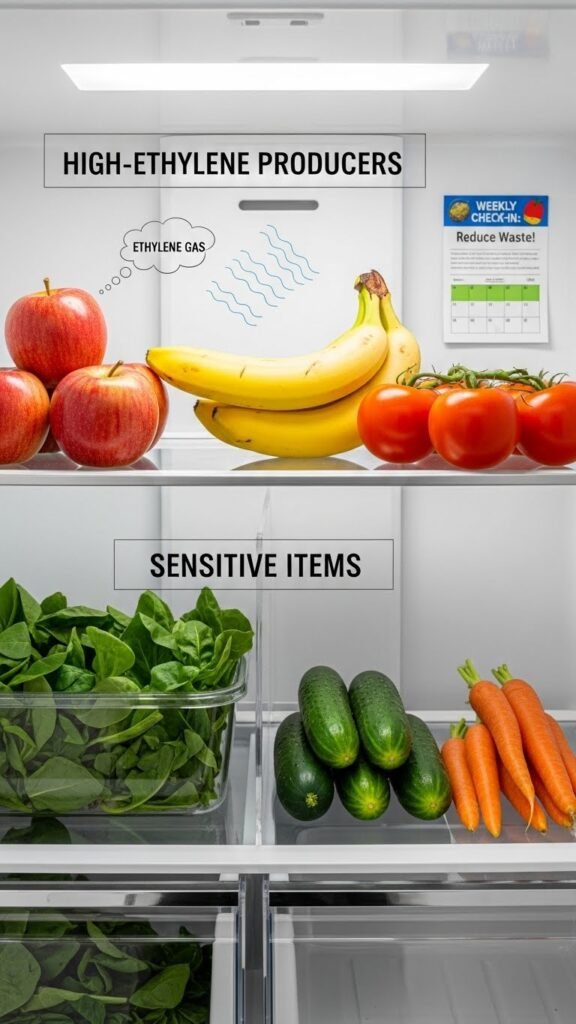
Because many fruits release ethylene gas as they ripen, you should separate high-ethylene producers (like apples, bananas, and tomatoes) from sensitive items (like leafy greens, cucumbers, and carrots) to slow spoilage and keep produce fresher longer.
Label zones with simple ethylene signage, group ripening companions together, and check weekly.
You’ll save food, feel empowered, and reduce waste.
Store Bread and Root Veggies Outside the Fridge
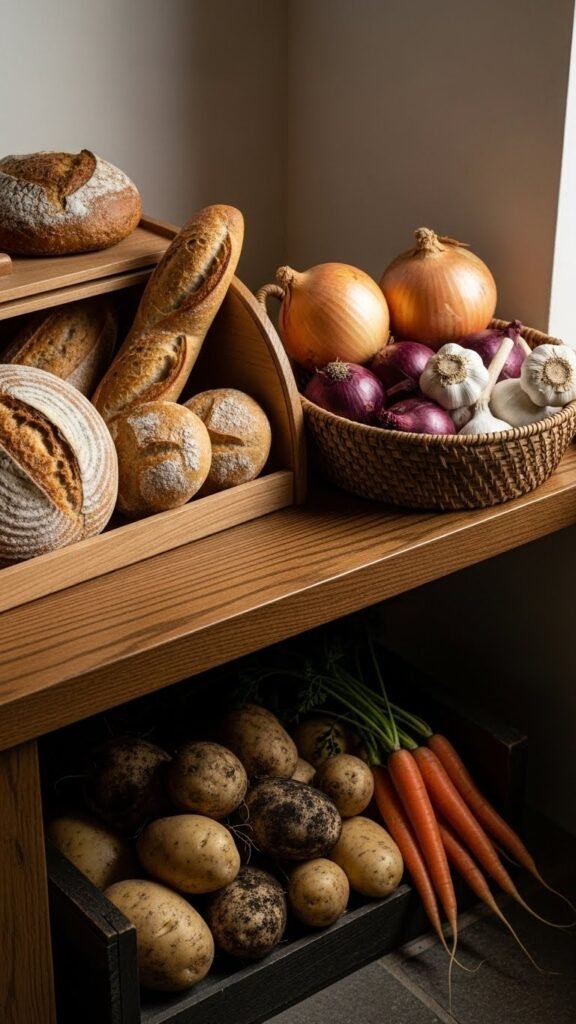
Keeping ethylene-producing fruits separate helps, but note that chilling isn’t always the answer for every item in your kitchen. Store bread in bread boxes to retain texture and slow mold without refrigeration.
Keep root veggies like potatoes and carrots in cool, dark spots—use countertop baskets for onions or garlic. You’ll preserve flavor, reduce waste, and enjoy more freedom in meal prep.
Use Clear Containers for Leftovers

Swap out mismatched containers for clear, stackable ones and you’ll instantly see what’s in your fridge, how much is left, and what needs to be eaten soon.
Clear containers boost portion visibility, reduce food waste, and let you plan flexible meals.
Choose glass or BPA-free plastic for stain prevention, airtight seals, and easy cleaning so you stay organized without feeling tied down.
Label and Date Everything
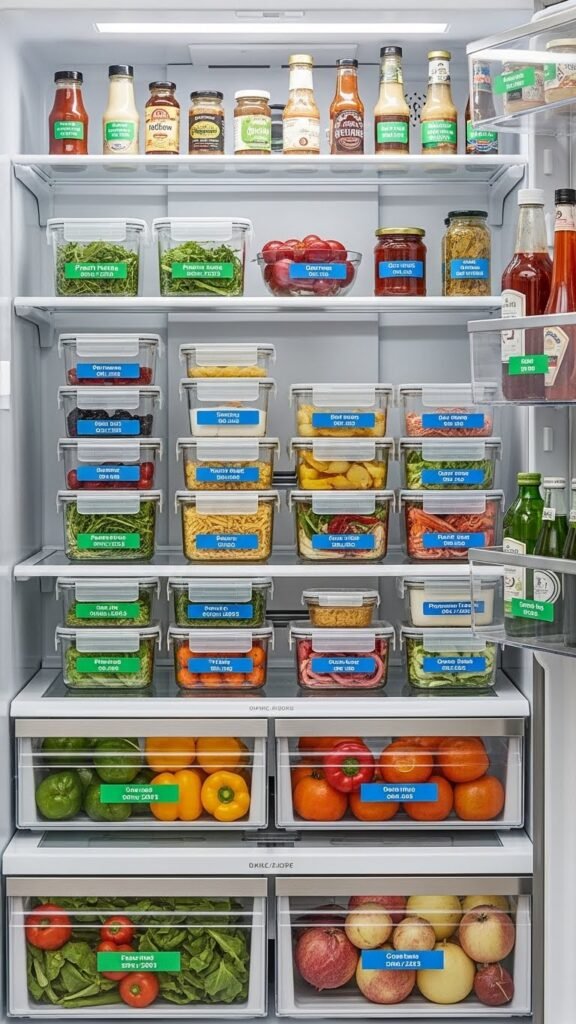
Once you can see what’s in your fridge, add labels and dates so nothing gets forgotten. You’ll reduce waste and stress by using simple expiration tracking—note prep and open dates.
Combine practical color coding for food types or urgency so decisions feel effortless. Evidence shows visible info improves choices; you’ll gain freedom, save money, and keep meals safer without extra work.
Rotate Older Items to the Front
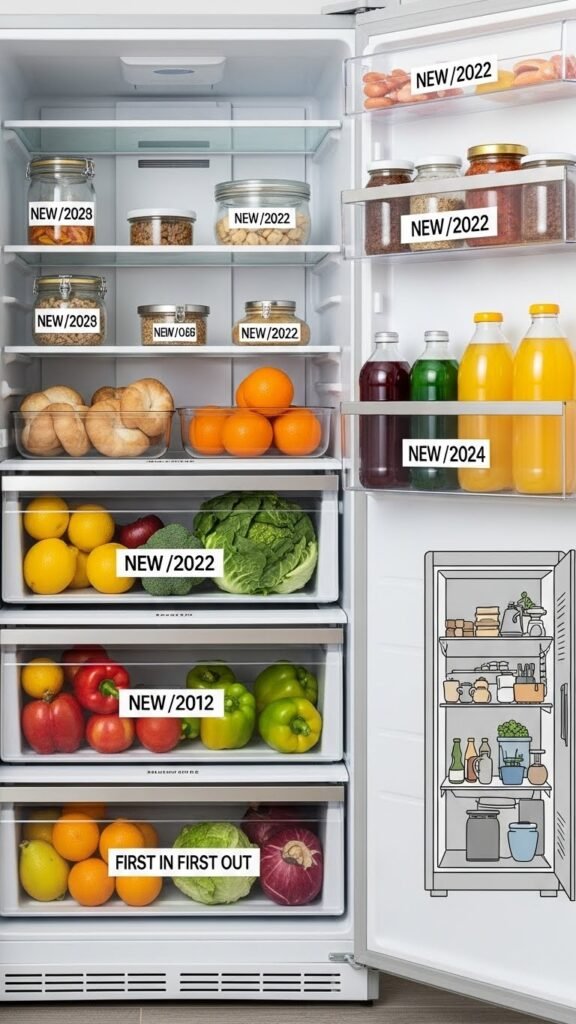
Regularly rotate older items to the front of your fridge so nothing gets forgotten and food waste drops—studies show visibility and easy access are key to using perishable items before they spoil.
Adopt a first in first out habit: label dates, move newly bought to the back, and mirror pantry rotation principles.
You’ll save money, time, and feel freer making choices that respect food.
Use Trays to Catch Drips and Spills
Slide in shallow trays under produce, deli meats, and jars to catch drips and keep spills contained — studies show containment strategies cut cleaning time and reduce cross-contamination risks.
You’ll want silicone matting or dedicated spill trays to corral leaks, making wipe-ups quick and less stressful.
This evidence-based habit preserves food, protects flavors, and gives you freedom from constant fridge scrubbing.
Keep Frequently Used Items at Eye Level

Often you’ll reach for the same items every day, so keep those staples—milk, condiments, yogurt, and grab-and-go snacks—at eye level to save time and cut decision fatigue.
This visibility optimization reduces search time and supports healthier choices. Place items by access frequency, rotate for freshness, and adjust shelf height so you’ll confidently grab what you need without unnecessary effort.
Group Similar Items Together
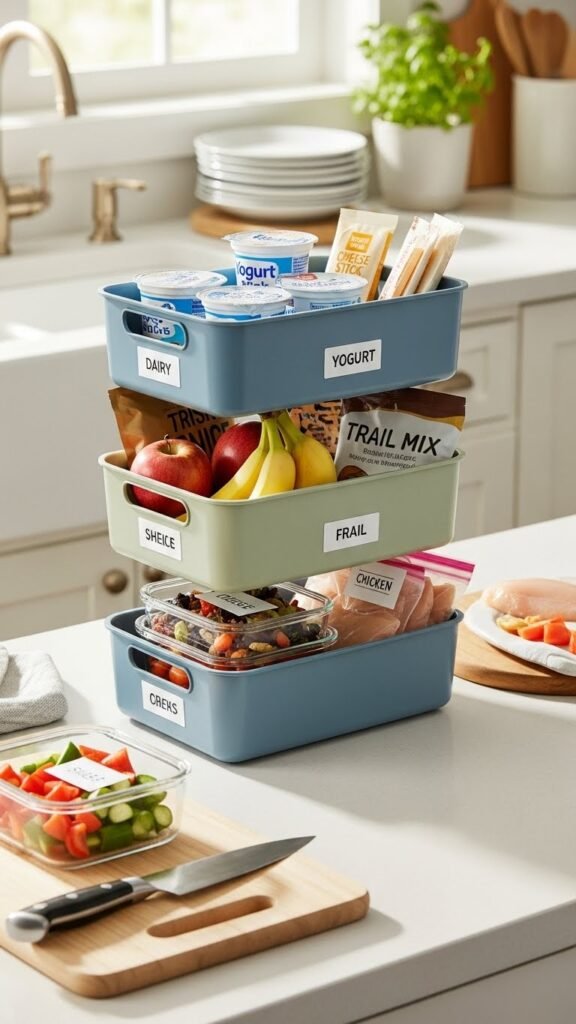
Group like items together so you can see what you have at a glance and avoid buying duplicates. Use stackable baskets and simple color coding to corral dairy, snacks, and meal prep ingredients.
Evidence shows visible organization reduces waste and decision fatigue, so you’ll save time and money. Tidy zones let you move freely, choose healthier options, and enjoy a calmer kitchen routine.
Avoid Overpacking for Proper Airflow

Once you’ve corralled items into clear zones, don’t cram the shelves — blocking airflow makes your fridge work harder and can shorten food life.
You’ll feel freer if you limit items per shelf and keep clear airflow pathways. Aim for space around vents, rotate perishables, and store similar temperatures together.
Small sacrifices in quantity boost freshness, efficiency, and peace of mind.
Clean and Inventory Weekly
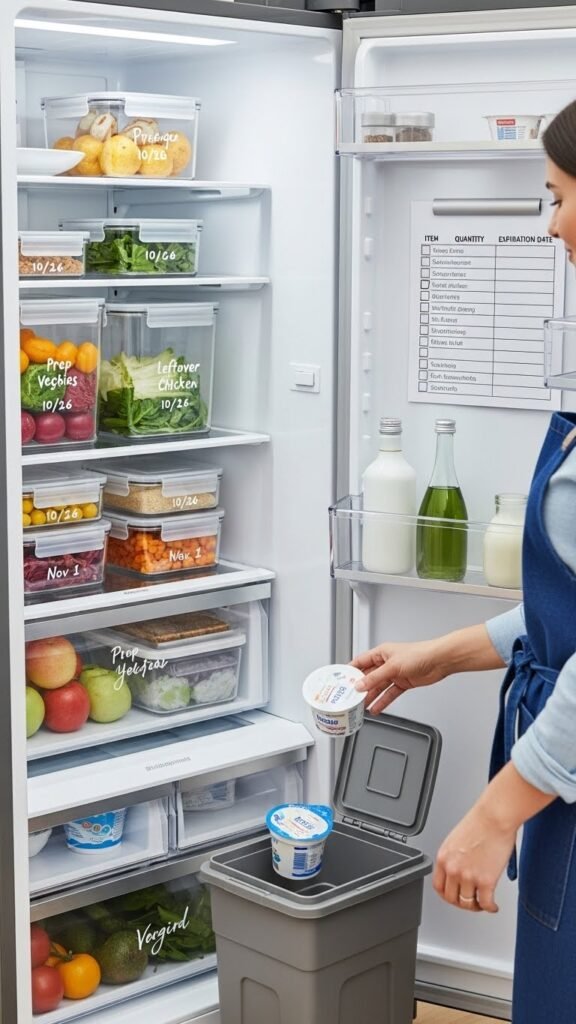
Regularly clean and inventory your fridge—set a weekly habit so you catch spills, expired items, and overlooked leftovers before they become problems.
You’ll feel freer with a simple inventory checklist and quick weekly purge. Use clear containers, label dates, toss questionable items, and note staples to restock.
This evidence-based routine saves time, reduces waste, and keeps meals healthy and stress-free.
Freeze Extras to Extend Shelf Life
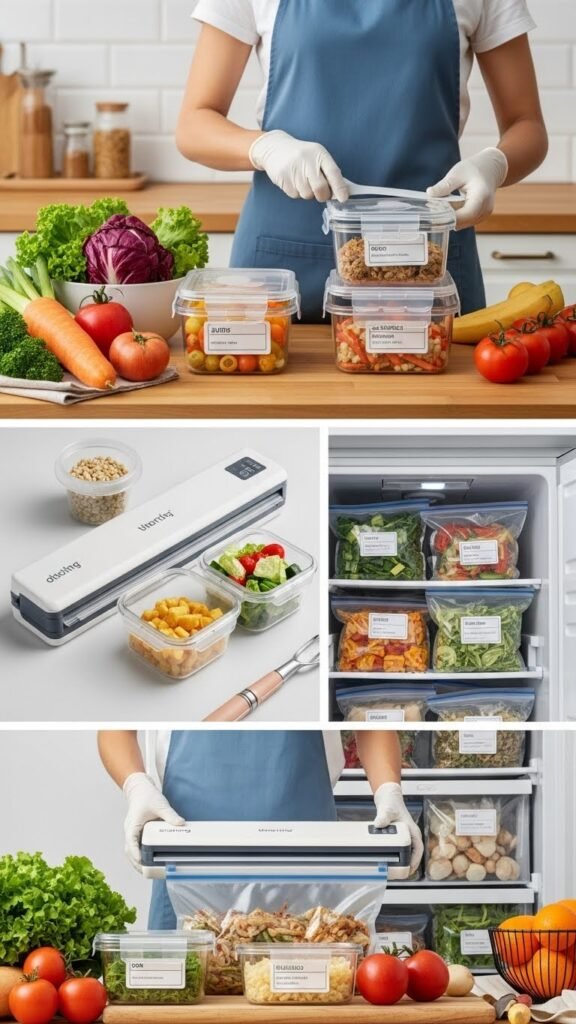
Don’t let surplus produce and cooked meals go to waste—freeze extras to stretch their usable life and save you time and money.
You’ll use portion freezing to control servings, label containers, and freeze at peak freshness.
Vacuum sealing reduces freezer burn and preserves nutrients longer.
These practical steps, supported by food safety guidance, give you freedom from daily prep while cutting waste and cost.
Store Herbs Like Flowers
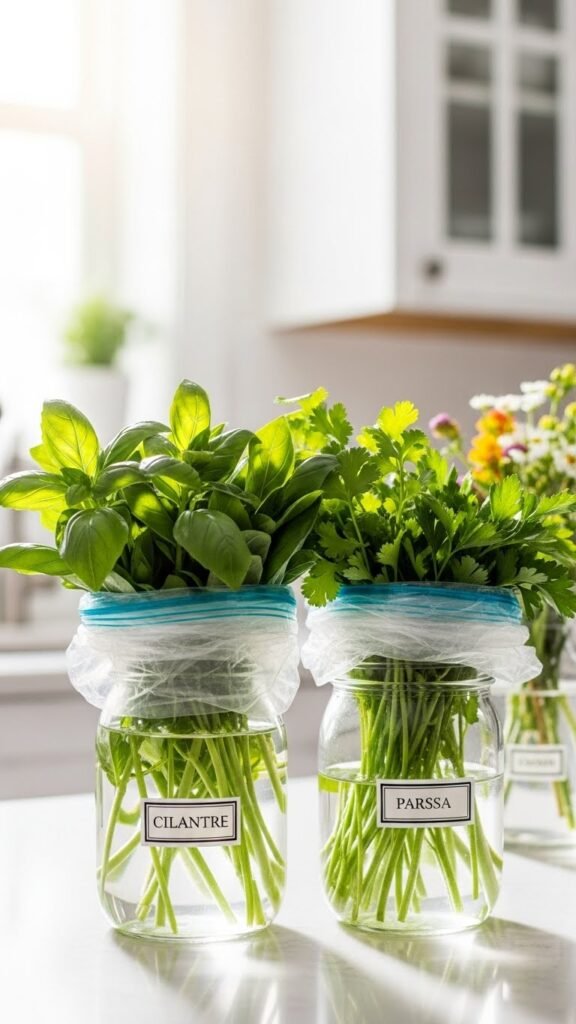
Treat herbs like little bouquets: trim the stems, place them in a jar of water, cover loosely with a plastic bag, and store them in the fridge to keep leaves crisp and aromatic for days longer.
You’ll preserve flavor, cut waste, and enjoy edible centerpieces on demand. Arrange herb bouquets thoughtfully, label jars, and refresh water regularly so you stay free to cook confidently.
Dry Greens Thoroughly Before Storing
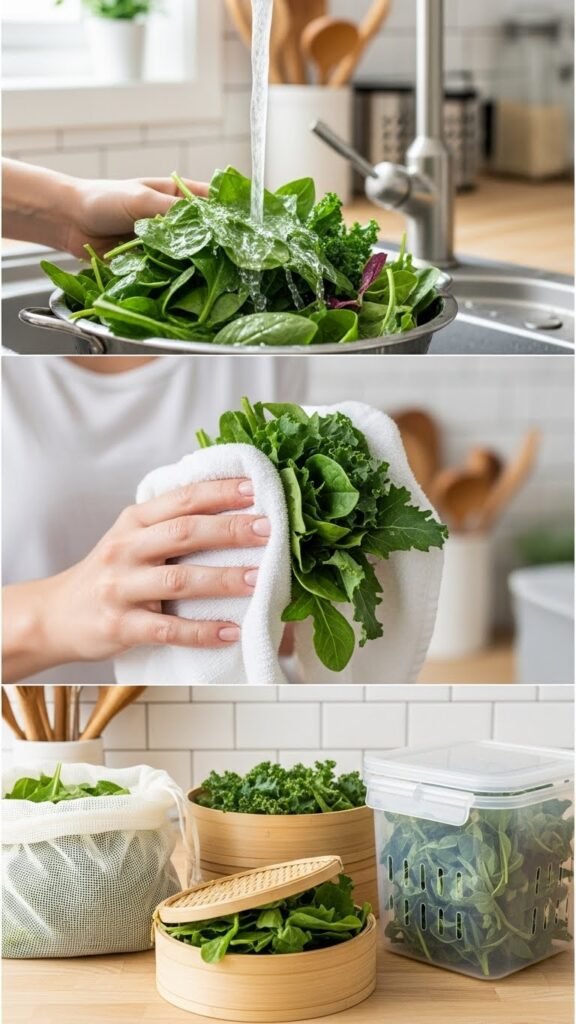
Washing and thoroughly drying leafy greens before you store them prevents excess moisture from accelerating spoilage and wilting.
You’ll extend crispness by patting leaves or using spin dry salads, then placing them in breathable containers or air dry baskets to keep airflow.
Evidence shows reduced microbial growth with drier greens, so dry gently, check often, and enjoy fresher, freer choices without waste.
Use Airtight Jars for Snacks and Produce
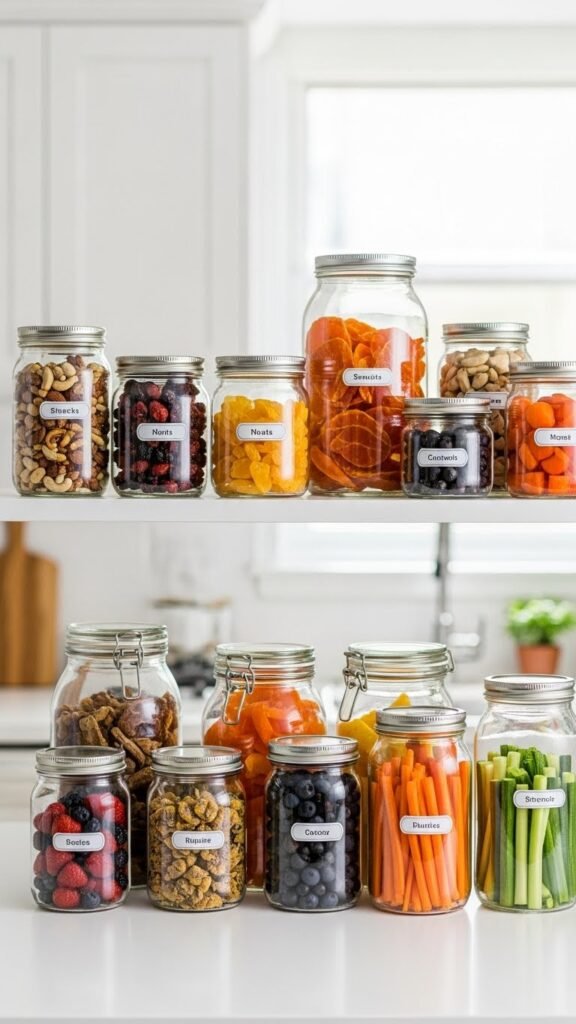
Swap flimsy bags for airtight jars to keep snacks and produce fresher longer — they cut oxygen exposure, slow moisture loss, and reduce odor transfer. You’ll enjoy airtight aesthetics that declutter shelves and preserve flavor.
Use clear jars to boost snack visibility so you grab what’s healthy. Practical studies back reduced spoilage; you’ll save money, waste less, and gain freedom to eat well.
Rinse Berries Only Before Eating
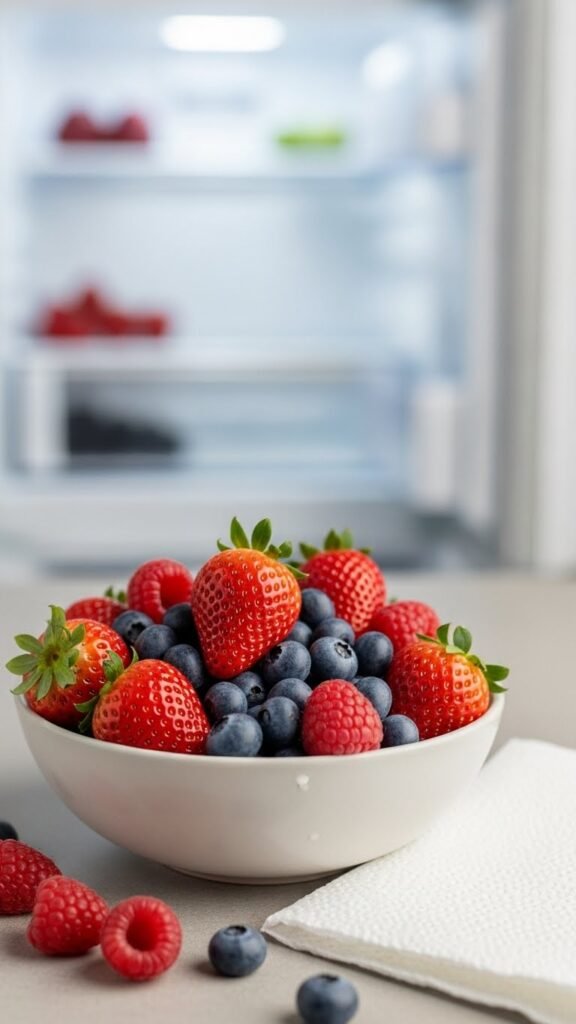
Often you should rinse berries only right before you eat them, because excess moisture speeds mold growth and shortens shelf life.
You’ll avoid pre rinse myths that push unnecessary washing.
Store berries unwashed, ventilated, and use quick berry drying with paper towels when serving.
That practical, evidence-based step preserves flavor and freedom to enjoy fresh fruit longer without waste or fuss.
Store Eggs on a Lower Shelf, Not the Door
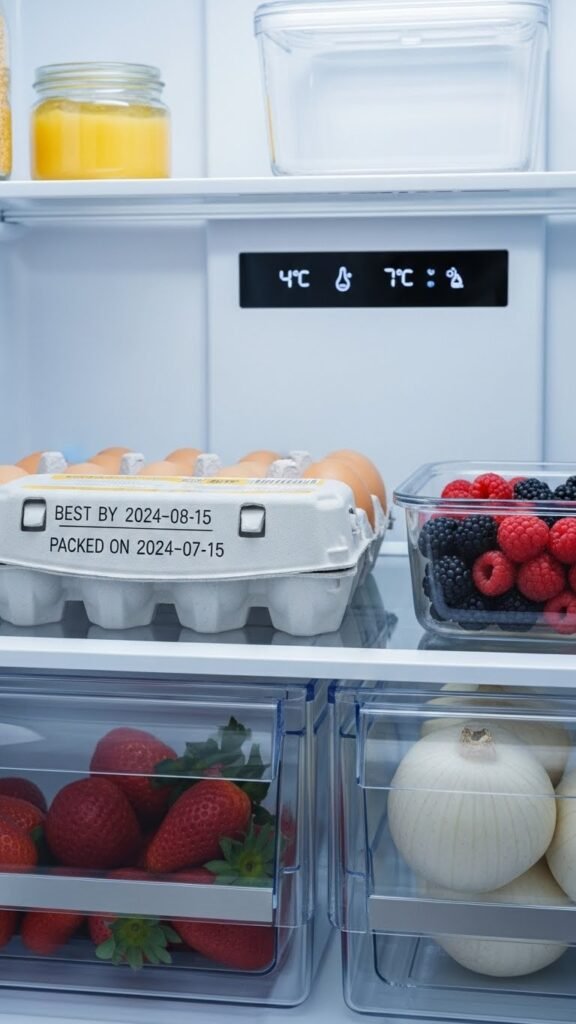
Keeping berries unwashed until serving helps control moisture—and the same attention to storage location matters for eggs. You’ll preserve egg freshness by keeping the carton on a lower, stable shelf where temperature’s consistent. Don’t use the door; its fluctuations shorten shelf life. Place the whole carton intact to protect eggs and track dates—simple carton placement boosts safety and gives you freedom from waste.
Keep a Small Bin for Peelings and Compostable Waste
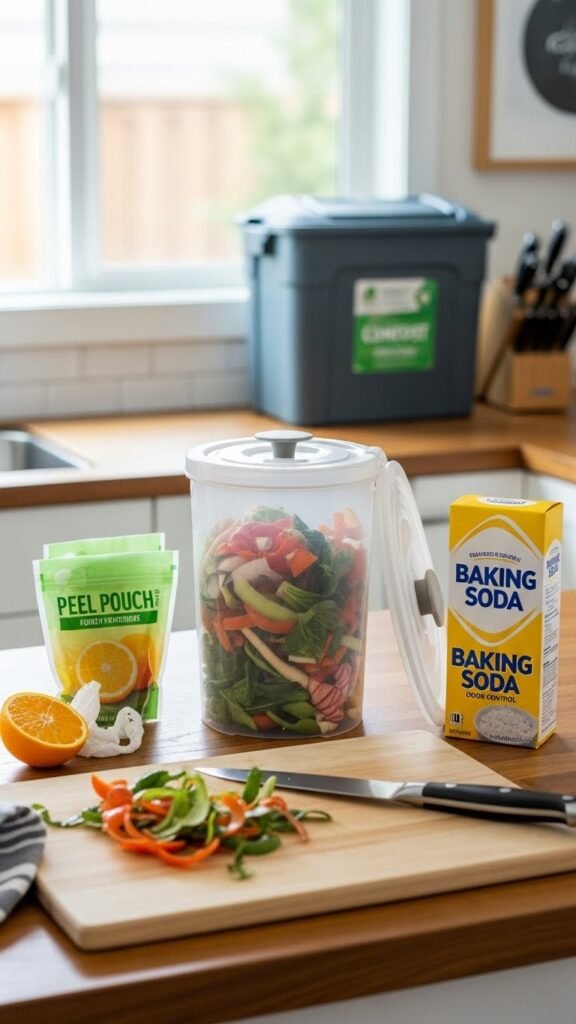
If you want less countertop clutter and fewer trips to the outdoor compost, keep a small lidded bin on or near your prep area for peelings and other compostable waste.
You’ll empty it by the kitchen sink or into a larger compost bin. Use peel pouches for citrus, practice odor control with baking soda, and enjoy the freedom of cleaner, efficient meal prep.